World Without Balance: Difference between revisions
(Created page with "==Summary== Welcome to the World without Balance Event! To start this quest, you must talk to Recruiter Naomi [Located in prt_gld 168, 108] who will require you to be in a p...") |
|||
| (79 intermediate revisions by 2 users not shown) | |||
| Line 1: | Line 1: | ||
==Summary== | ==Summary== | ||
Welcome to the World without Balance | Welcome to the World without Balance Instance! | ||
[[File:Recruit Naomi.png|right|frame|'''Recruiter Naomi''' prt_gld 168, 108]] | |||
[[ | To start this quest, you must talk to [[NPC:Recruiter Naomi|Recruiter Naomi]], located in prt_gld 168, 108, who will require you to be in a party of six with the level requirement of 255 for all. | ||
'''Tip: You can reach [[NPC:Recruiter Naomi|Recruiter Naomi]] by teleporting via the @hub Chauffeur, situated toward right!''' | |||
{|class="prettyTable" | |||
| colspan="2"|'''Requirements''' | |||
|- | |||
| '''Base Level:''' | |||
| 255/120 | |||
|- | |||
| '''Party:''' | |||
| 6 Members | |||
|- | |||
| '''Quest Prerequisite(s):''' | |||
| None | |||
|} | |||
</br> | |||
Once you have gathered your team, you may talk to Recruiter Naomi to start the instance that happens across three maps. | Once you have gathered your team, you may talk to Recruiter Naomi to start the instance that happens across three maps. | ||
This quest or instance can be repeated | |||
Cooldown for Instance: 24 hrs | Cooldown for Instance: 24 hrs | ||
'''Notes:''' | |||
* Alt Usage: Not allowed, each player can only use one char per time. | |||
* '''Premium Items''' are allowed, except [Angra_Manyu Angra Manyu] and [Ahura_Mazdah Ahura Mazdah]. | |||
* '''Max Stats Characters''' are allowed. | |||
* You have 60 min to finish the instance (in either Normal or Nightmare mode). | |||
* @storage is disabled on all instance maps. | |||
* You are granted re-entry into the Instance, in case you died. Those are limited to: | |||
** 3 re-entry on '''Normal''' Mode. | |||
** 1 re-entry on '''Nightmare''' Mode. | |||
</br> | |||
==Background Story== | |||
==="What is dead should remain, as if it doesn't, the balance of the world is disrupted."=== | |||
The appearance of Vanna had raised the Undead King back to life, distorting the balance of life and equity. Draphael opened a dimensional rift between Midgard and the Underworld... calling forth a gloomy castle from the beyond the dimensional rift. Many Rune Midgardian scouts were deployed to gain intel of the mysterious castle, just for them to be unheard of again. Until they re-emerged... as the undead. Now servants of the gloomy castle, they attacked nearby towns and villages, burning them down to nothingness. | |||
Unwavering, the injured Queen called forth the adventurers of Rune Midgard to curb the threat of the ominous castle and its minions. | |||
===Vanna's Story, the Beginning=== | |||
Adventurers were gathered to defeat the Undead King to restore peace to Rune Midgard. After his defeat, Queen Catherine D. Geoborg, journeyed into Niflheim to investigate the source of the calamity. But the answers would only serve to be a source of further dread. It is learnt that the Undead King was brought into our world by the baleful witch of legends. Vanna, the servant of Jormungandr, the World Serpent. During her investigation, the Queen and her retinue were attacked in the midst of a mysterious fog. Or so says the only survivor to return from the expedition. In urgent response, adventurers set out on a rescue mission to save the queen! But this would only be the beginning or worse things to come. | |||
</br> | |||
==Instance Maps== | ==Instance Maps== | ||
===First Map=== | ===First Map=== | ||
The first map will involve Varunastra who guards the entrance of the Undead King's Castle; to gain access, you must defeat all the Undead Scouts as well as Varunastra to venture further... | [[File:Wwb in01.png|left]][[File:Vanurastra.png|right]] | ||
The first map will involve '''Varunastra''' who guards the entrance of the Undead King's Castle; to gain access, you must defeat all the '''Undead Scouts''' as well as '''Varunastra''' to venture further... | |||
<div style="clear:both;"> </div></br> | |||
[[ | ===Monsters:=== | ||
*[[Monster:Undead Scout M|Undead Scout M]] | |||
*[[Monster:Undead Scout F|Undead Scout F]] | |||
*[[Monster:Vanurastra|Vanurastra]] | |||
</br> | |||
===Second Map=== | ===Second Map=== | ||
In the second map, you and your team must venture into four different entrances that will lead you to four different Elemental Guardians to destroy... but do venture carefully as what meets the eye may be deceiving... | In the second map, you and your team must venture into '''four different entrances''' that will lead you to four different '''Elemental Guardians''' to destroy... but do venture carefully as what meets the eye may be deceiving... | ||
[[File:Elemental Guardian Fire.png]][[File:Elemental Guardian Earth.png]][[File:Elemental Guardian Thunder.png]][[File:Elemental Guardian Water.png]] | <center>[[File:Elemental Guardian Fire.png]][[File:Elemental Guardian Earth.png]][[File:Elemental Guardian Thunder.png]][[File:Elemental Guardian Water.png]]</center> | ||
<div style="clear:both;"> </div></br> | |||
===Monsters:=== | |||
*[[Monster:Fire Elemental|Fire Elemental]] | |||
*[[Monster:Water Elemental|Water Elemental]] | |||
*[[Monster:Wind Elemental|Wind Elemental]] | |||
*[[Monster:Earth Elemental|Earth Elemental]] | |||
</br> | |||
===Third Map=== | ===Third Map=== | ||
Once all the Elemental Guardians have been defeated, the Deity of Balance will appear to converse with you all before it decides to destroy you all. You must defeat the Deity of Balance in order to enter the Final Map. | [[File:Wwb in02.png|left]][[File:Deity of Balance.gif|right]] | ||
Once all the Elemental Guardians have been defeated, the '''Deity of Balance''' will appear to converse with you all before it decides to destroy you all. | |||
You must defeat the '''Deity of Balance''' in order to enter the Final Map. | |||
<div style="clear:both;"> </div></br> | |||
===Monsters:=== | |||
*[[Monster:Deity of Balance|Deity of Balance]] | |||
</br> | |||
===Final Map=== | ===Final Map=== | ||
[[File:Wwb in03.png|left]][[File:Draphael.png|right]] | |||
In the final map, you and your team will face off against '''Draphael''', who is both human and angel as the Messenger of Ruler of the Underworld. | |||
Once you have defeated Draphael, you shall be rewarded, but be warned, this is no easy task. | |||
= | <div style="clear:both;"> </div></br> | ||
*Draphael (Human | ===Monsters:=== | ||
*Draphael (Angel | *[[Monster:Draphael (Human)|Draphael (Human)]] | ||
*[[Monster:Draphael (Angel)|Draphael (Angel)]] | |||
*[[Monster:Evil Hand (Totem)|Evil Hand (Totem)]] | |||
==Fight Mechanics== | |||
There are two modes: '''Normal''' and '''Nightmare''' | |||
'''On Nightmare mode, stats of the monsters are boosted and Monsters HP are doubled.''' | |||
*'''Draphael (Human Form)''' switches between 10% Physical and Magical Reflect status every 20 seconds (Indicated by Blue/Green Aura) | |||
*'''Draphael (Angel Form)''' is different, spawns a Totem every 2 minutes, Totem grants Draphael 100% Reflect for Physical and Magical Attack. | |||
==Title Rewards== | |||
Here are the two titles that you may claim: | |||
==Rewards== | |||
Here are the | |||
* | *'''Title: Balance Master''' | ||
Requirement: Complete World Without Balance on Nightmare Mode '''10 times'''. | |||
*'''Title: Wombat Warrior''' | |||
Requirement: Complete World Without Balance on Normal Mode '''30 times'''. | |||
==Rewards== | |||
After finishing the instance, '''you need talk again with [[NPC:Recruiter Naomi|Recruiter Naomi]] to redeem your rewards'''. | |||
This reward can either be one of the items in the shop, or a Token of Balance (Normal or Nightmare, depending on which mode you played). | |||
Latest revision as of 14:29, 5 December 2022
Summary
Welcome to the World without Balance Instance!
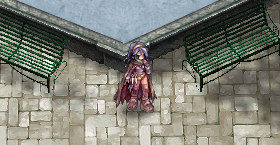
To start this quest, you must talk to Recruiter Naomi, located in prt_gld 168, 108, who will require you to be in a party of six with the level requirement of 255 for all.
Tip: You can reach Recruiter Naomi by teleporting via the @hub Chauffeur, situated toward right!
| Requirements | |
| Base Level: | 255/120 |
| Party: | 6 Members |
| Quest Prerequisite(s): | None |
Once you have gathered your team, you may talk to Recruiter Naomi to start the instance that happens across three maps.
    This quest or instance can be repeated
    Cooldown for Instance: 24 hrs
Notes:
- Alt Usage: Not allowed, each player can only use one char per time.
- Premium Items are allowed, except [Angra_Manyu Angra Manyu] and [Ahura_Mazdah Ahura Mazdah].
- Max Stats Characters are allowed.
- You have 60 min to finish the instance (in either Normal or Nightmare mode).
- @storage is disabled on all instance maps.
- You are granted re-entry into the Instance, in case you died. Those are limited to:
- 3 re-entry on Normal Mode.
- 1 re-entry on Nightmare Mode.
Background Story
"What is dead should remain, as if it doesn't, the balance of the world is disrupted."
The appearance of Vanna had raised the Undead King back to life, distorting the balance of life and equity. Draphael opened a dimensional rift between Midgard and the Underworld... calling forth a gloomy castle from the beyond the dimensional rift. Many Rune Midgardian scouts were deployed to gain intel of the mysterious castle, just for them to be unheard of again. Until they re-emerged... as the undead. Now servants of the gloomy castle, they attacked nearby towns and villages, burning them down to nothingness.
Unwavering, the injured Queen called forth the adventurers of Rune Midgard to curb the threat of the ominous castle and its minions.
Vanna's Story, the Beginning
Adventurers were gathered to defeat the Undead King to restore peace to Rune Midgard. After his defeat, Queen Catherine D. Geoborg, journeyed into Niflheim to investigate the source of the calamity. But the answers would only serve to be a source of further dread. It is learnt that the Undead King was brought into our world by the baleful witch of legends. Vanna, the servant of Jormungandr, the World Serpent. During her investigation, the Queen and her retinue were attacked in the midst of a mysterious fog. Or so says the only survivor to return from the expedition. In urgent response, adventurers set out on a rescue mission to save the queen! But this would only be the beginning or worse things to come.
Instance Maps
First Map
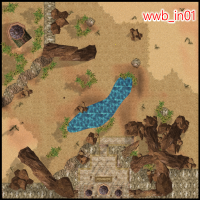
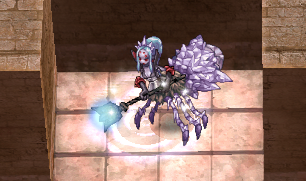
The first map will involve Varunastra who guards the entrance of the Undead King's Castle; to gain access, you must defeat all the Undead Scouts as well as Varunastra to venture further...
Monsters:
Second Map
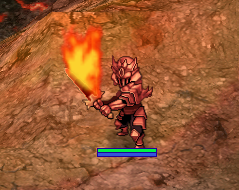
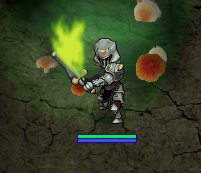
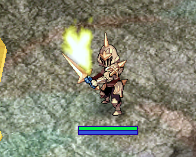
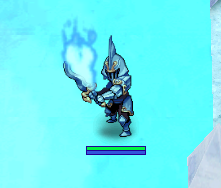
In the second map, you and your team must venture into four different entrances that will lead you to four different Elemental Guardians to destroy... but do venture carefully as what meets the eye may be deceiving...
Monsters:
Third Map
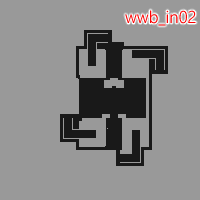
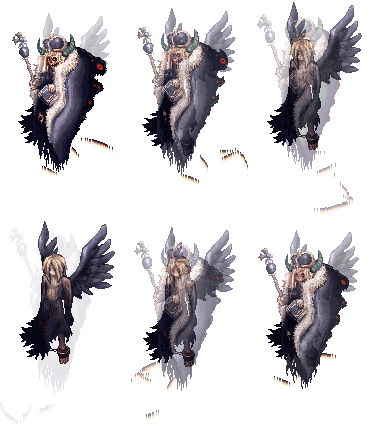
Once all the Elemental Guardians have been defeated, the Deity of Balance will appear to converse with you all before it decides to destroy you all.
You must defeat the Deity of Balance in order to enter the Final Map.
Monsters:
Final Map
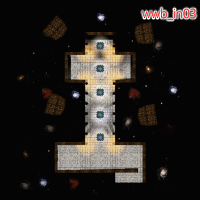
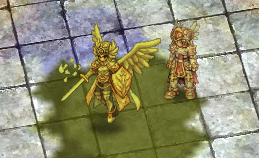
In the final map, you and your team will face off against Draphael, who is both human and angel as the Messenger of Ruler of the Underworld.
Once you have defeated Draphael, you shall be rewarded, but be warned, this is no easy task.
Monsters:
Fight Mechanics
There are two modes: Normal and Nightmare
On Nightmare mode, stats of the monsters are boosted and Monsters HP are doubled.
- Draphael (Human Form) switches between 10% Physical and Magical Reflect status every 20 seconds (Indicated by Blue/Green Aura)
- Draphael (Angel Form) is different, spawns a Totem every 2 minutes, Totem grants Draphael 100% Reflect for Physical and Magical Attack.
Title Rewards
Here are the two titles that you may claim:
- Title: Balance Master
Requirement: Complete World Without Balance on Nightmare Mode 10 times.
- Title: Wombat Warrior
Requirement: Complete World Without Balance on Normal Mode 30 times.
Rewards
After finishing the instance, you need talk again with Recruiter Naomi to redeem your rewards.
This reward can either be one of the items in the shop, or a Token of Balance (Normal or Nightmare, depending on which mode you played).